
The restoration of a 1957 Factory Supercharged Thunderbird By Tom Maruska
PAGE JUMPER
Back to Page 1 Home Page 9
| PAGE 8 After removing all the old primer and stripper residue with the DA sander and 80 grit paper I covered the entire body exterior with filler and used a 30" sanding board with 80 grit paper to sand it all smooth. A second application of filler followed by 180 grit paper gets it ready for new primer. The second application of filler fills the 80 grit scratches. The subsequent application of black epoxy primer to the entire body seals the exposed bare metal and then I painted the underside of the body and the interior with Colonial White urethane enamel. Then I masked off all the finished areas and applied 2 coats of Evercoat "Feather Fill G2" which is a high build sprayable filler to the exterior of the car. The epoxy primer doesn't need to be black, but I had it on hand so I used it. 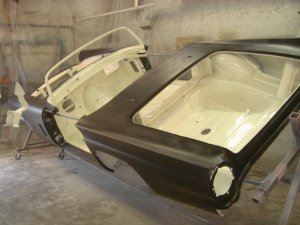 This is with the interior and underside finished and the exterior in black epoxy primer. 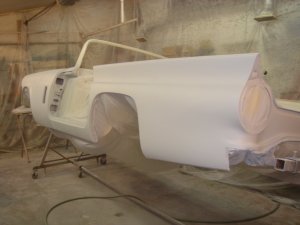 This picture shows the body after the application of the "Feather Fill" and the "K36" primers and it is ready for finish paint. This is followed by long board sanding with 240 Grit paper and fills any small imperfections that may be left in the filler. The next step is to spray 2 coats of PPG K36 primer whch is followed by wet sanding with 400 grit paper and the body is ready for the color and clear applications. I sprayed 3 coats of Colonial White base coat followed by 3 coats of Clear. The next day after the clear has set the color sanding begins and I begin by wet sanding the entire body with 1000 Grit paper, then again with 1500 grit paper and then one final sanding with 2000 grit paper. By the time these sandings are done the body is looking pretty nice and very smooth. The wet sandings are then followed by buffing with 3M "Extra Cut" buffing compound and a white buffing pad. The white pads are stiff and very durable for hard buffing. After this stem is done the shine is pretty much back in the paint. One thing that is important is to tape all of the edges and ridges in the body with 3/4" masking tape BEFORE you beging the "Extra Cut" buffing as it is very easy for the buffer to catch an edge and the stiff white pad will cut through to the bare metal in a hurry. |
Wash the body thoroughly to completely remove all the left over "Extra Cut" compound, then dry it with a chamois and you're ready to move on to the next buffing which will be done with 3M "Swirl Mark Remover" and a black buffing pad. The black pad is very soft and relatively safe on the edges so take all the masking tape off. You still need to be very careful with the buffer on the edges but you will have to remove the 2000 grit sanding scratches that were under the tape so you will have to work at it a little harder than you will on the flats. When using the buffer on the edges hold it so that the direction of spin is coming off the flat out over the edge. You are less likely to have a burn through that way. You'll get more comfortable with it as you progress but always be aware of where you are and the direction of spin. 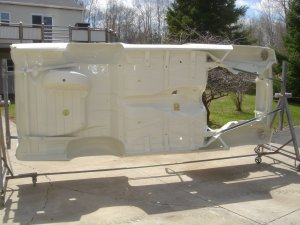 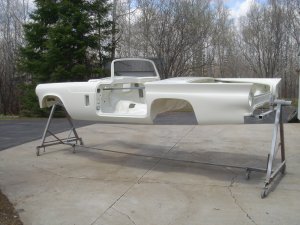 It's nice to have this major part of the restoration completed. Now I'll concentrate on finishing the duct work, bumper brackets and other parts left before I put the body back on the chassis. It'll be easier to install the ductwork, dash and some other parts while I can have the body on edge or upside down rather than me being on my back doing it if it was on the chassis. Next time I'll be assembling parts to the body and setting the body back on the chassis and I'll show you the parts that make up the supercharger system on the "F" Birds. Return to TOM MARUSKA CARS Move ahead TO PAGE 9 |