The restoration of the 1956 XM Turnpike Cruiser continues....
By Tom Maruska
THE WORST IS OVER!
Once I complete the rust repair on the front of the car around the bumpers,
I left off last time as I had just completed upholstering one of the seat backs for a change of pace. Shortly after that I had one seat 100% complete and here's the proof:

It's very Jetsonish.
Some of you younger folks probably aren't familiar with the Jetsons
but they were a futuristic space age cartoon family on TV in the early 60's.
The complete interior of the XM Turnpike Cruiser is very space age
and actually predates the Jetsons by almost a decade.
Nonetheless it's a very well put together interior
and as time slides by you'll get to see it get restored.
THE WINDSHIELD BUNK
I've been dreading this part of the restoration
since I started working on the car over a year ago.
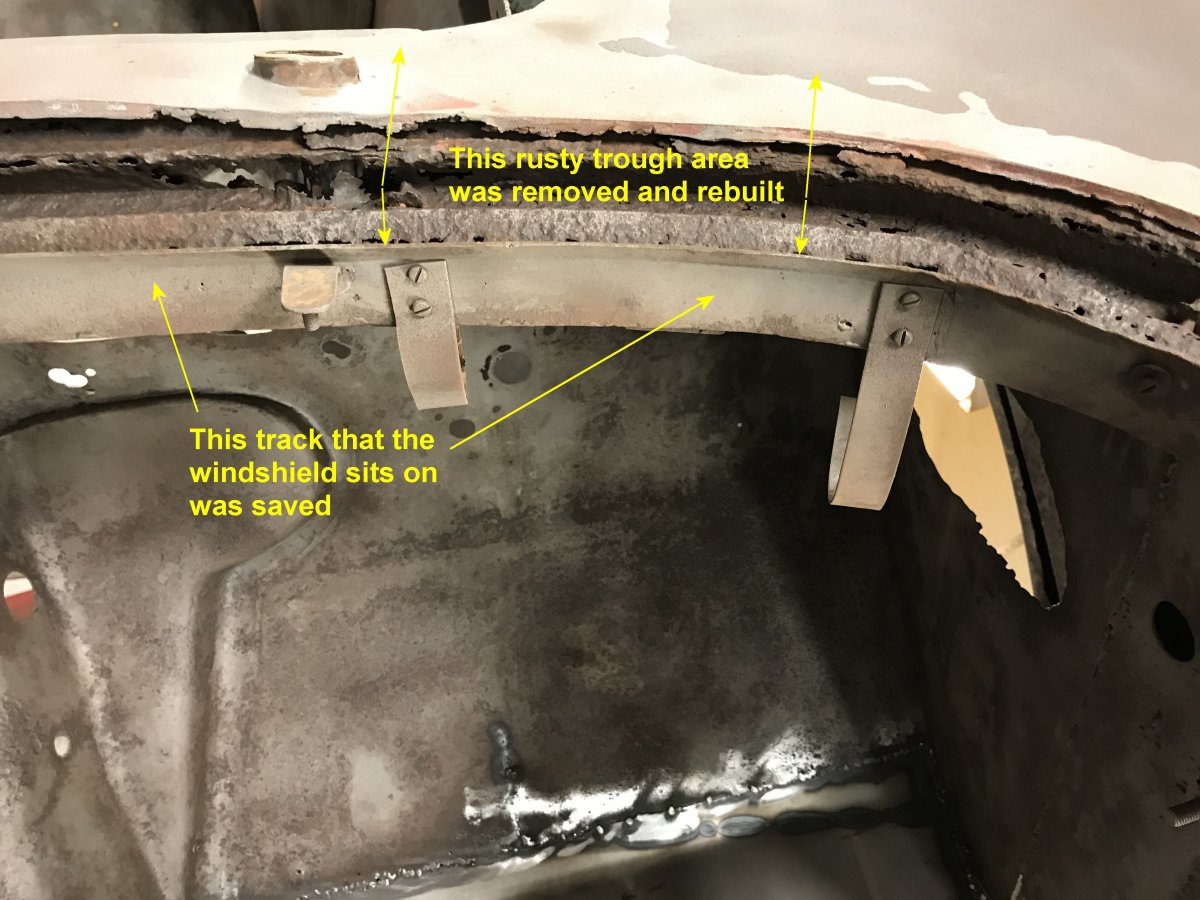
This is the area that the windshield sits on.
It's a little different on the XMTC than any other car I've worked on
in that the windshield sits about an inch below the deck of the cowl.
It's designed that way so there is no black rubber windshield seal
breaking up the vista flowing into the car.
After the windshield gets installed,
another filler strip painted body color
gets installed flush with the top of the cowl
and the dash gets installed on the inside right up to the glass
so the transition from outside to inside is nice and obstacle free.
There was no means to drain this recess when they built the car
and as a result this area rusted away nearly completely.
Fortunately the track that the windshield rubber sits on
was still solid so I was able to save that
in order to maintain the original shape of the windshield base.
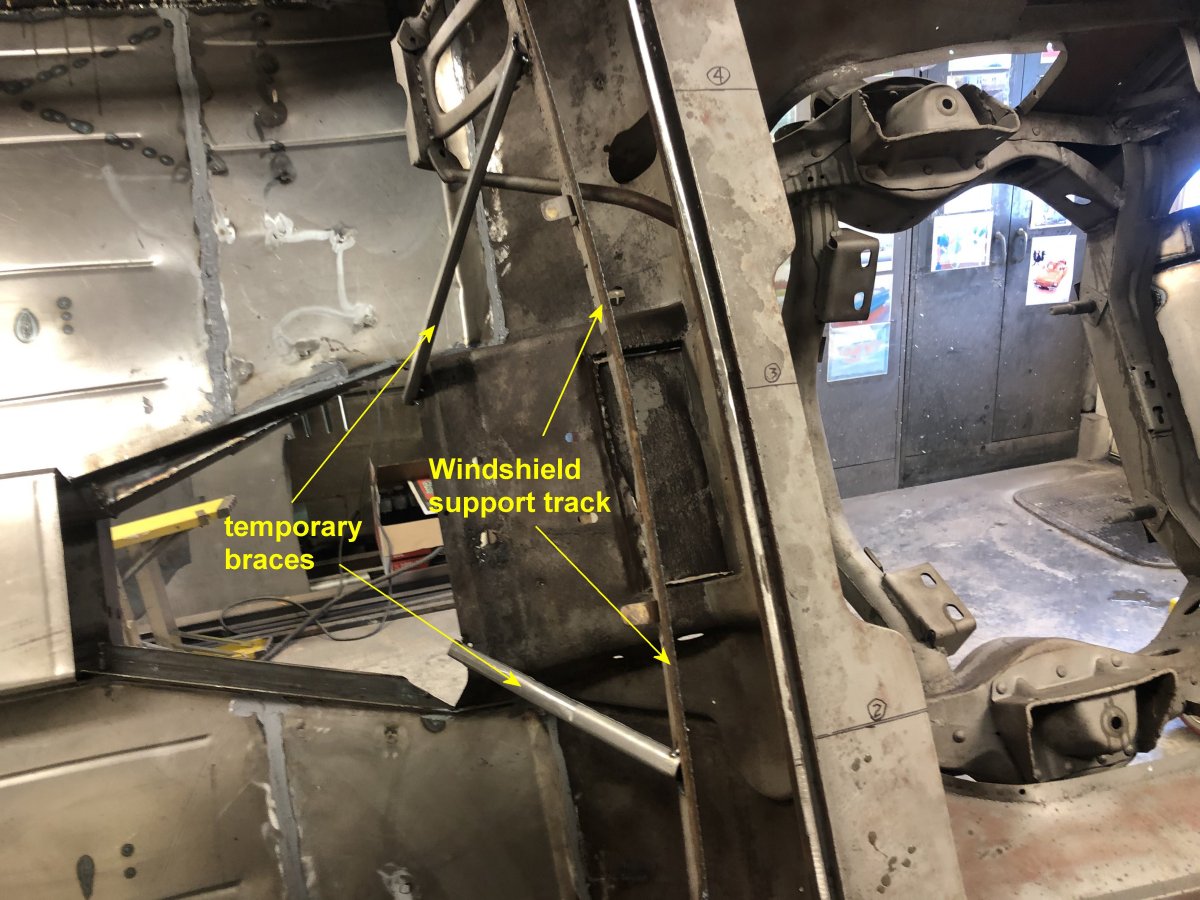
I had to reconstruct all of the structure that supports the glass,
windshield wiper motor and wiper arms.
I also constructed a trough below it all
with several drain tubes
which will eventually get rubber hoses attached
and drain through the bottom of the firewall to outside.
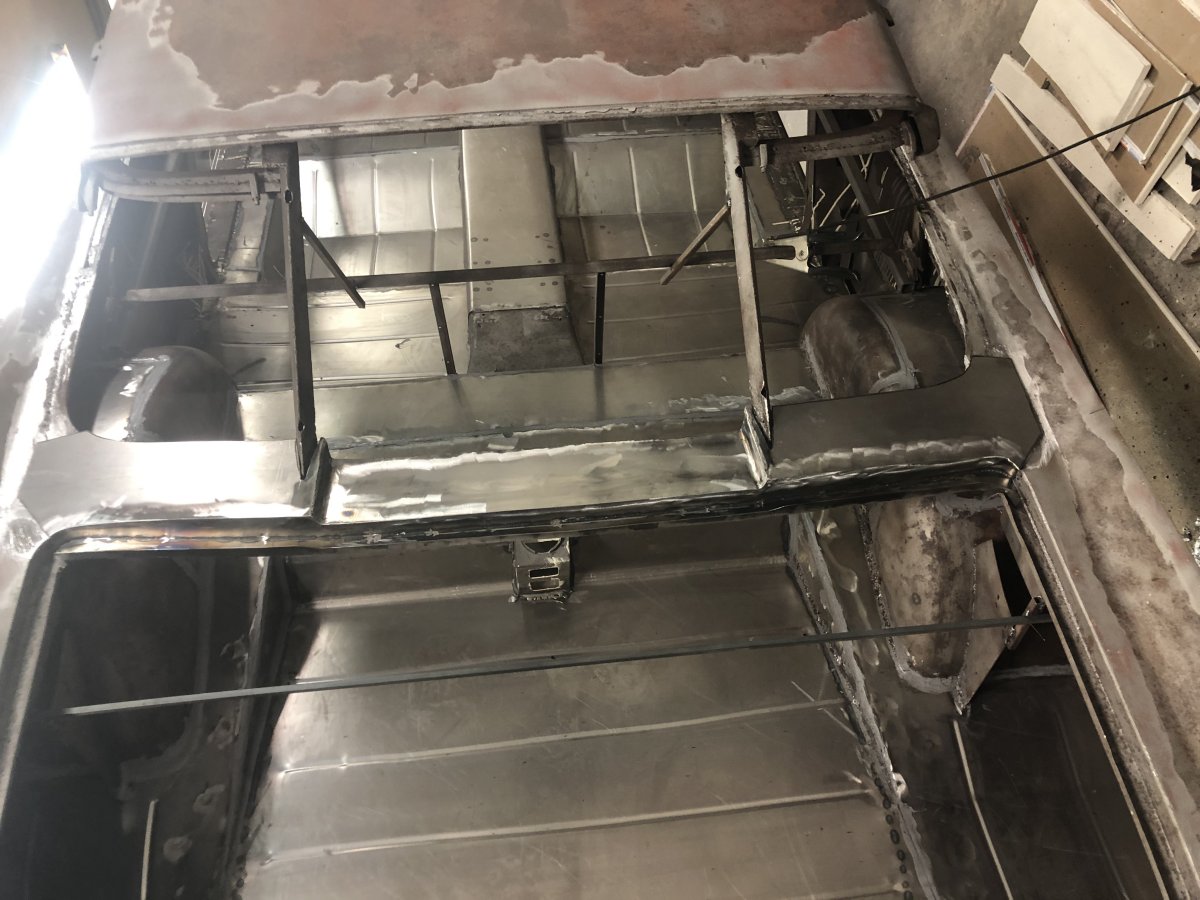
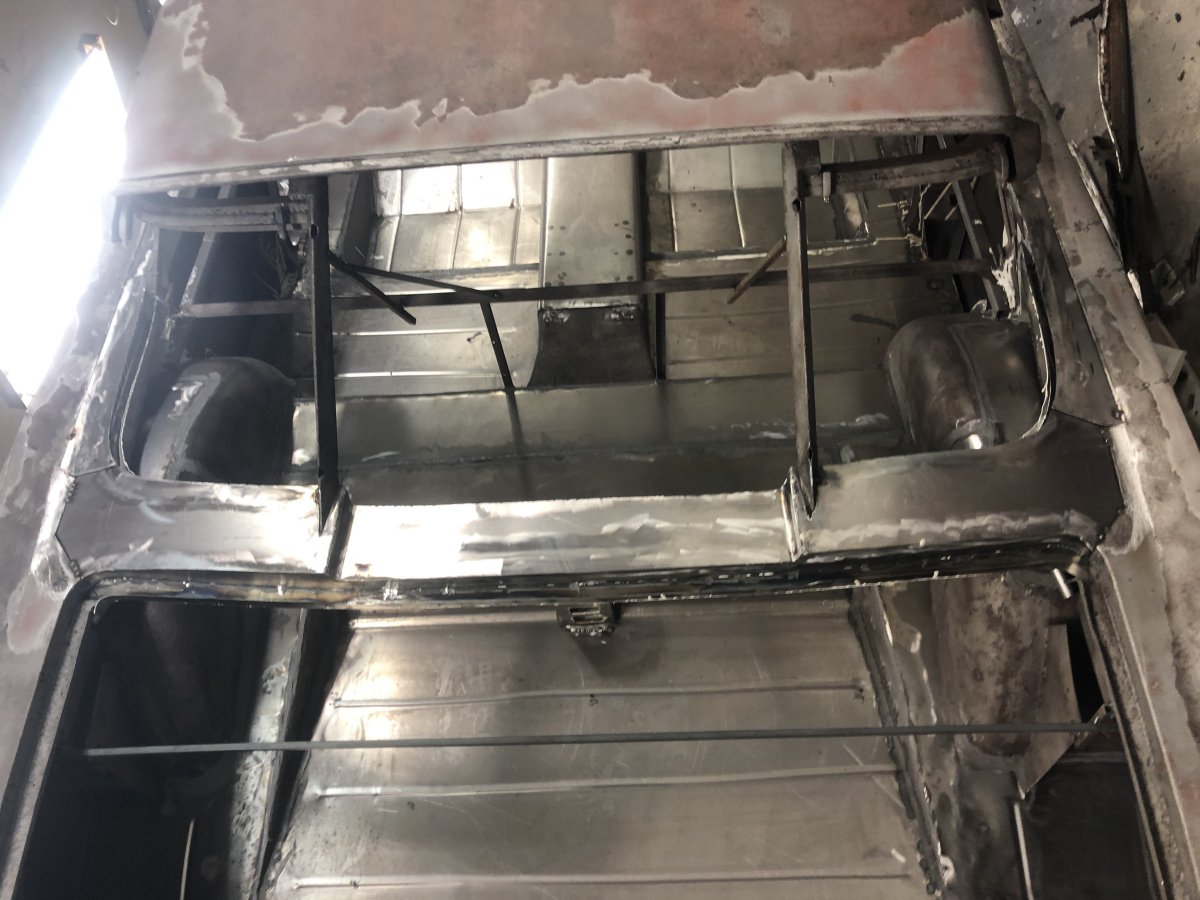
Here are a couple pictures of the area.
With the purchase of the XMTC
I got a professionally built plaster mold for the windshield.
When I wrote about this project on a Facebook page
a gentleman named Glen Durmisevich wrote and said
"When Ray Sabo owned it there was no windshield.
So he called Don DeLaRosa,
who was Fords design liaison to Ghia
when the Turnpike Cruiser was built.
DeLaRosa had gone to Chrysler
and became VP of their design department
When Ray called him. He sent a couple Chrysler modelers
over to clay up a windshield and make the molds."
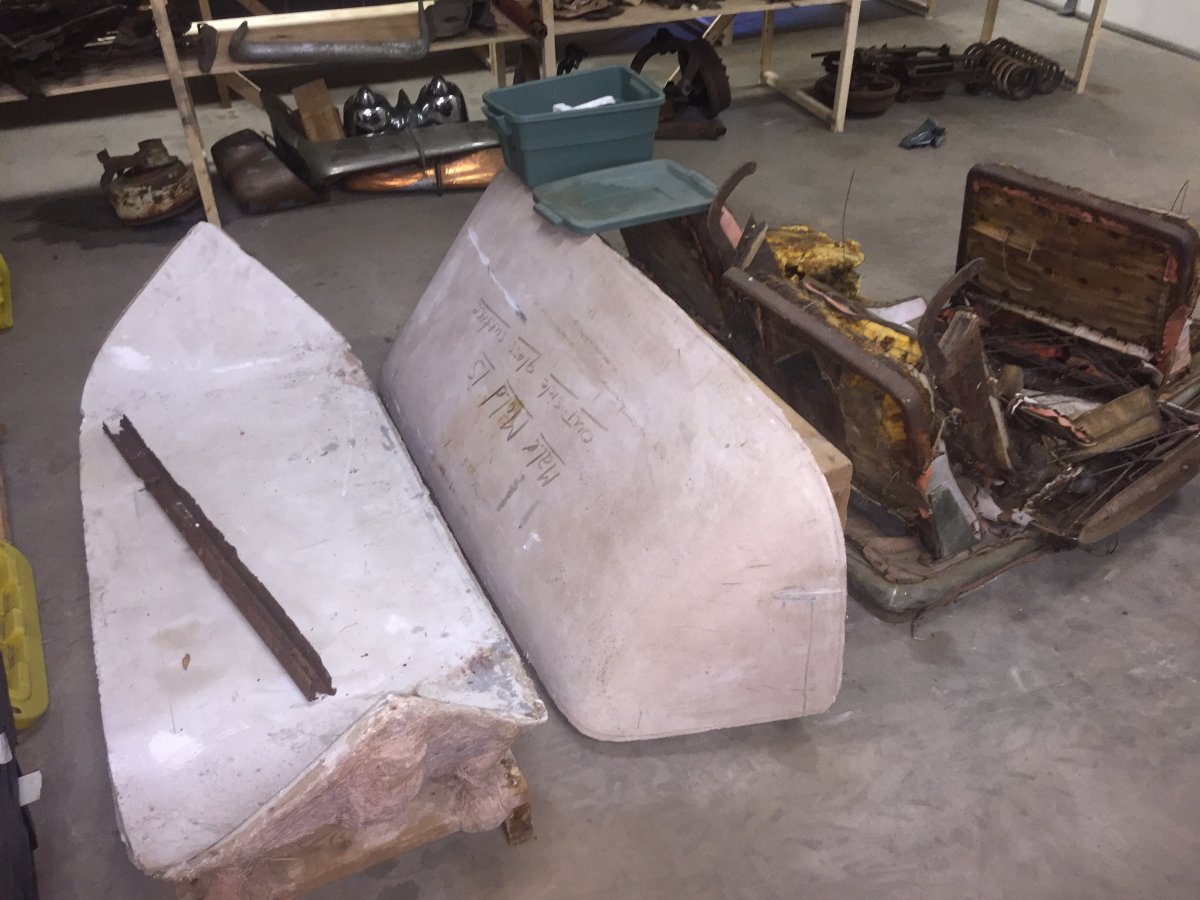

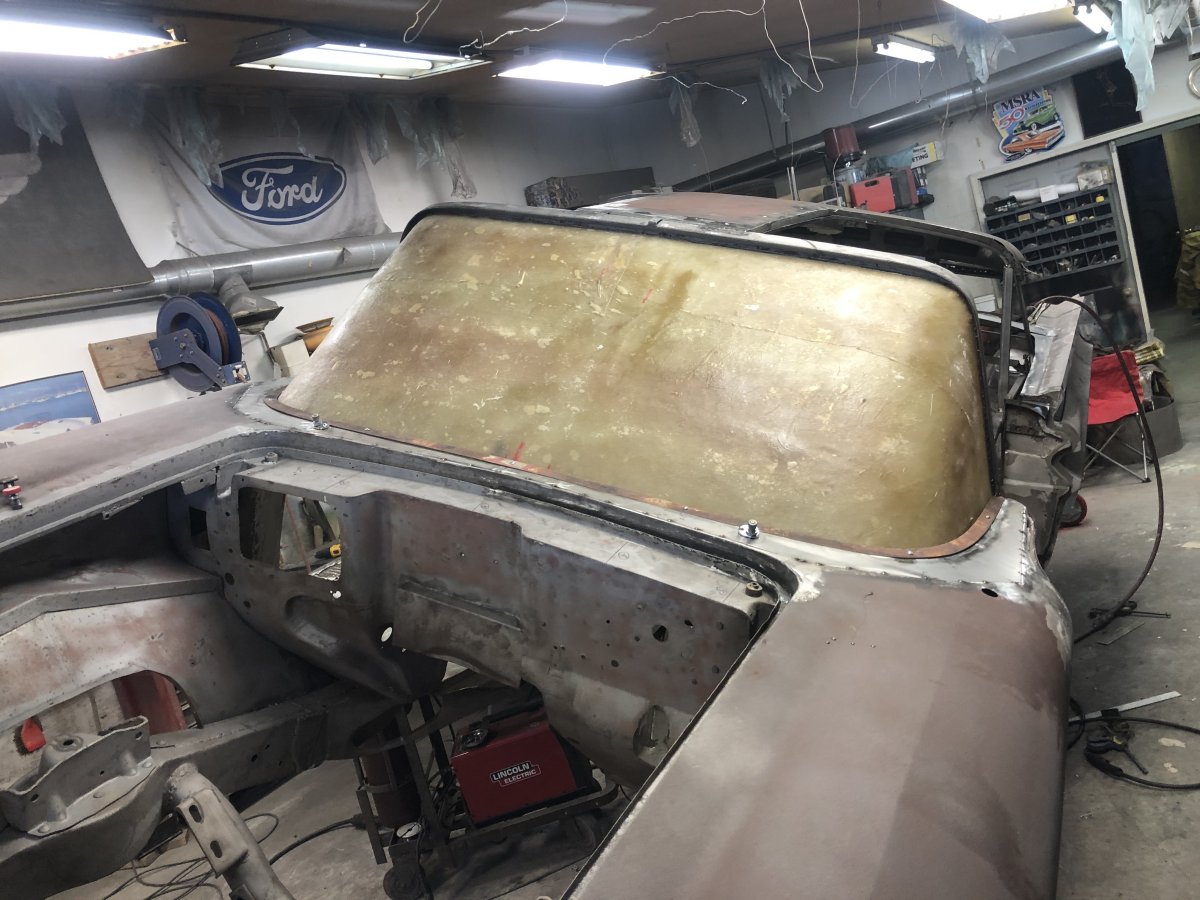
To my amazement and great satisfaction it fit perfectly!
In this picture you can see the filler between the cowl and "windshield".
All that's left now for this section is to build a crate
for the plaster mold and ship it off to Canada
and wait for the new glass to arrive.
After getting into it, it wasn't as bad as I feared.
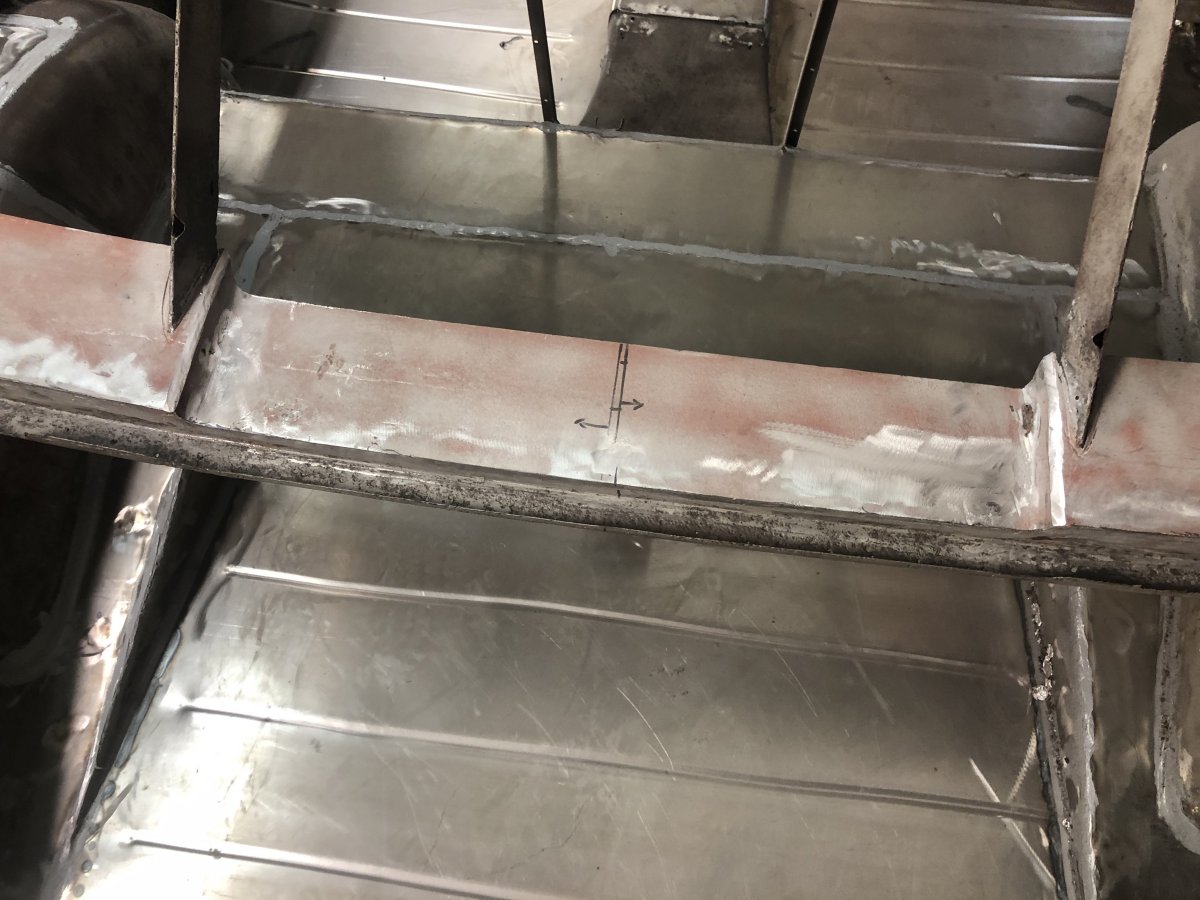
MORE OF THE SAME
The situation was the same alongside the quarter
and rear windows as under the windshield.
Not much left.
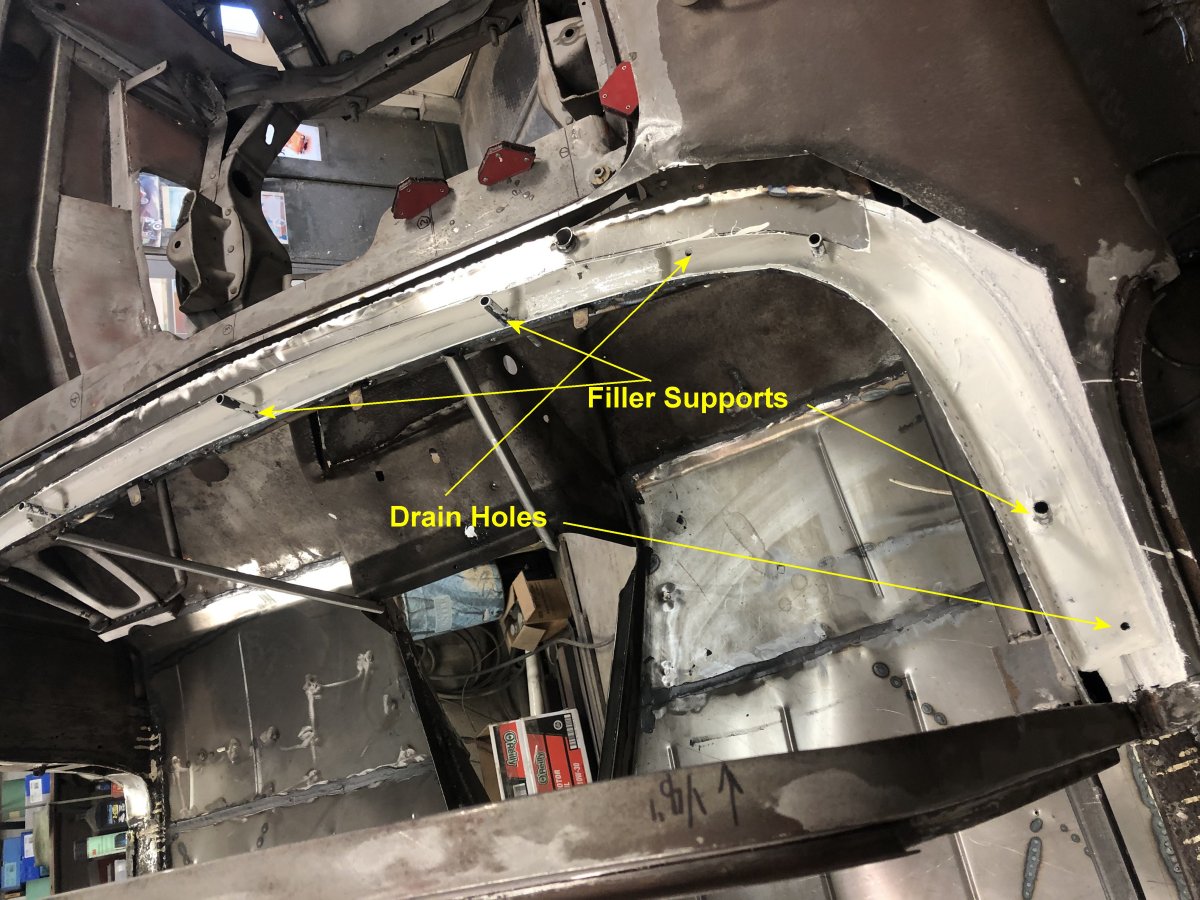
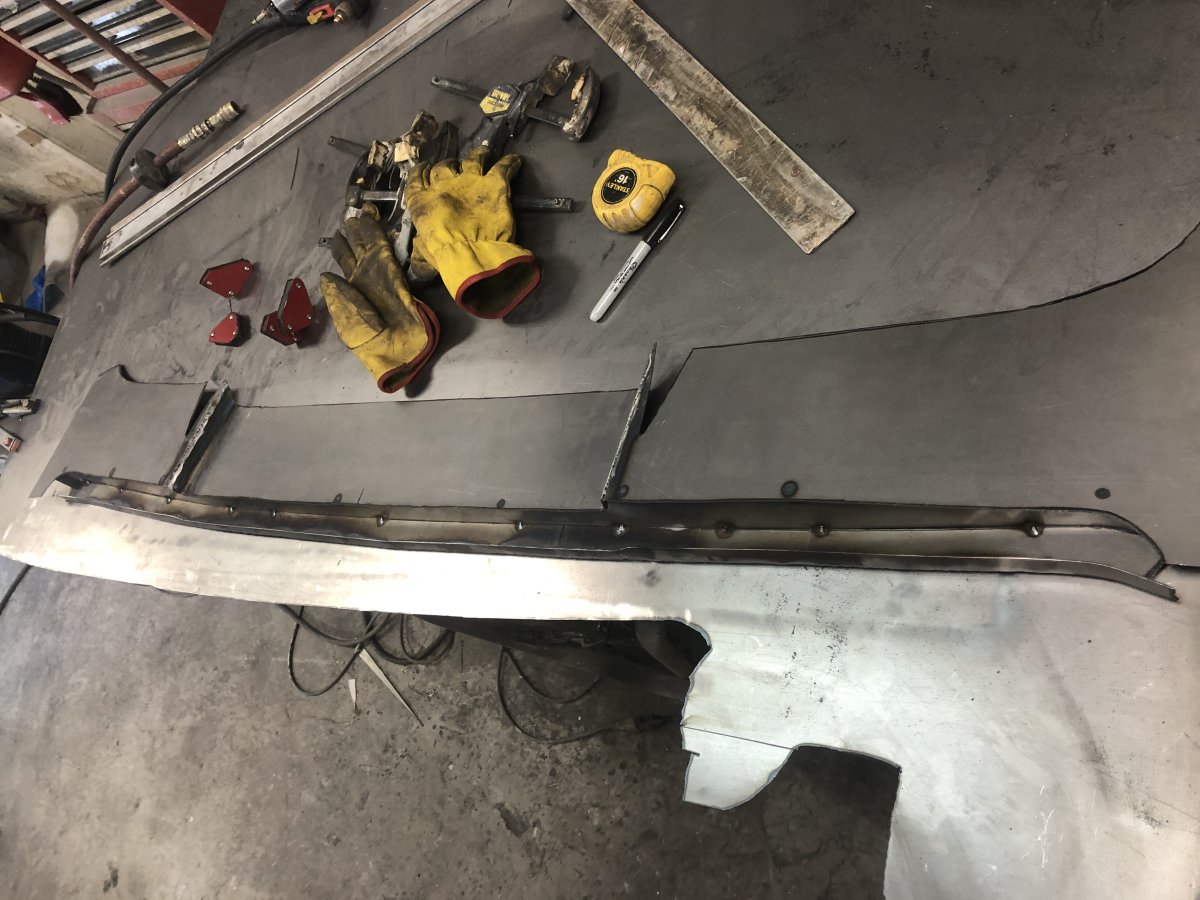
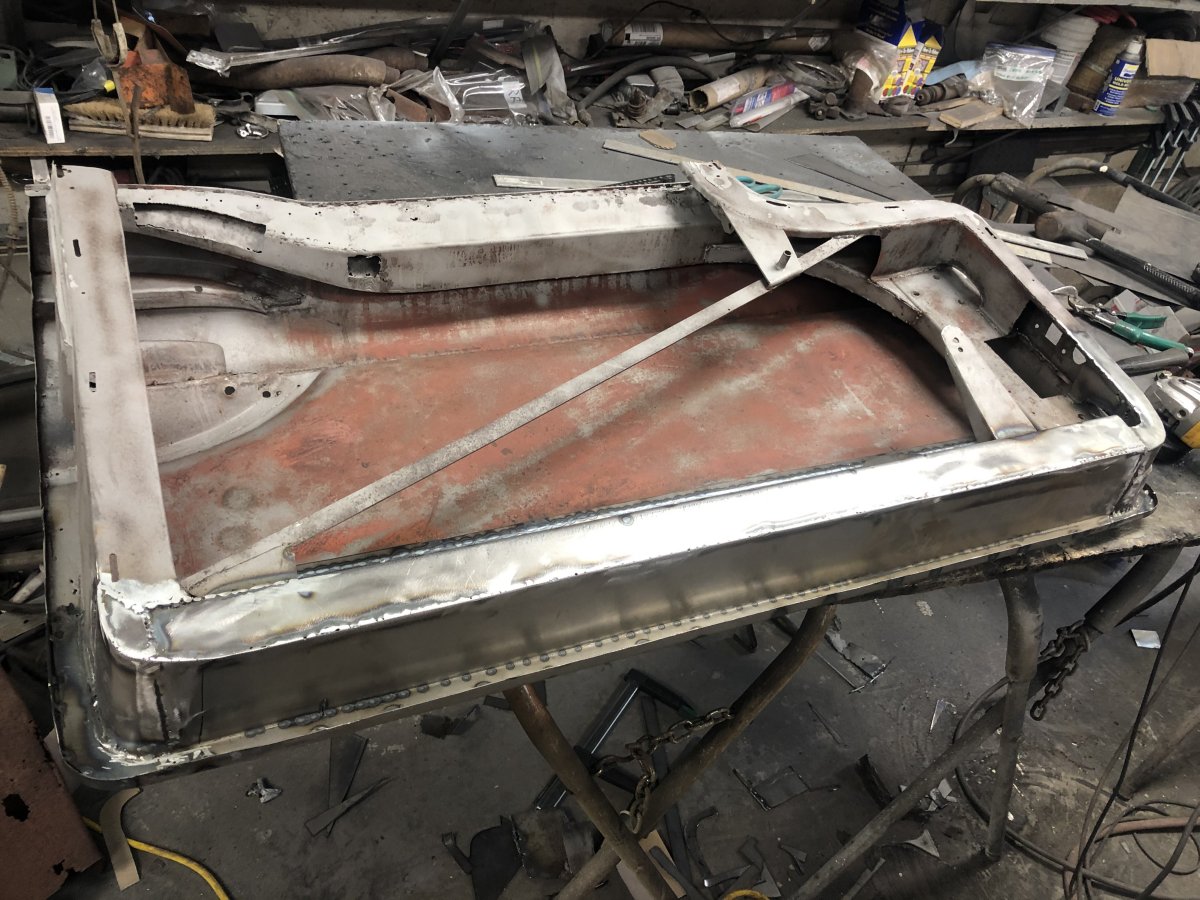
I began by making a paper template of the surface of the rear cowl.
(That area between the back glass and trunk opening)
I cut out the top sheet metal and bent it to match the original
and cut out the notches for the roof supports
and laid it on top of the original piece to make sure I'd have a good fit.
I scribed the end edges of the new piece
on to the car body so I'd know where to cut it out.
When it was good I proceeded to build the drain trough
under the front edge of the trunk lid
and the support structure underneath the cowl.
Then I used the plasma cutter to cut the rusted piece away
on my scribe lines and around the roof support posts.
I should say that before cutting I welded temporary supports to the roof.
I didn't want anything moving.
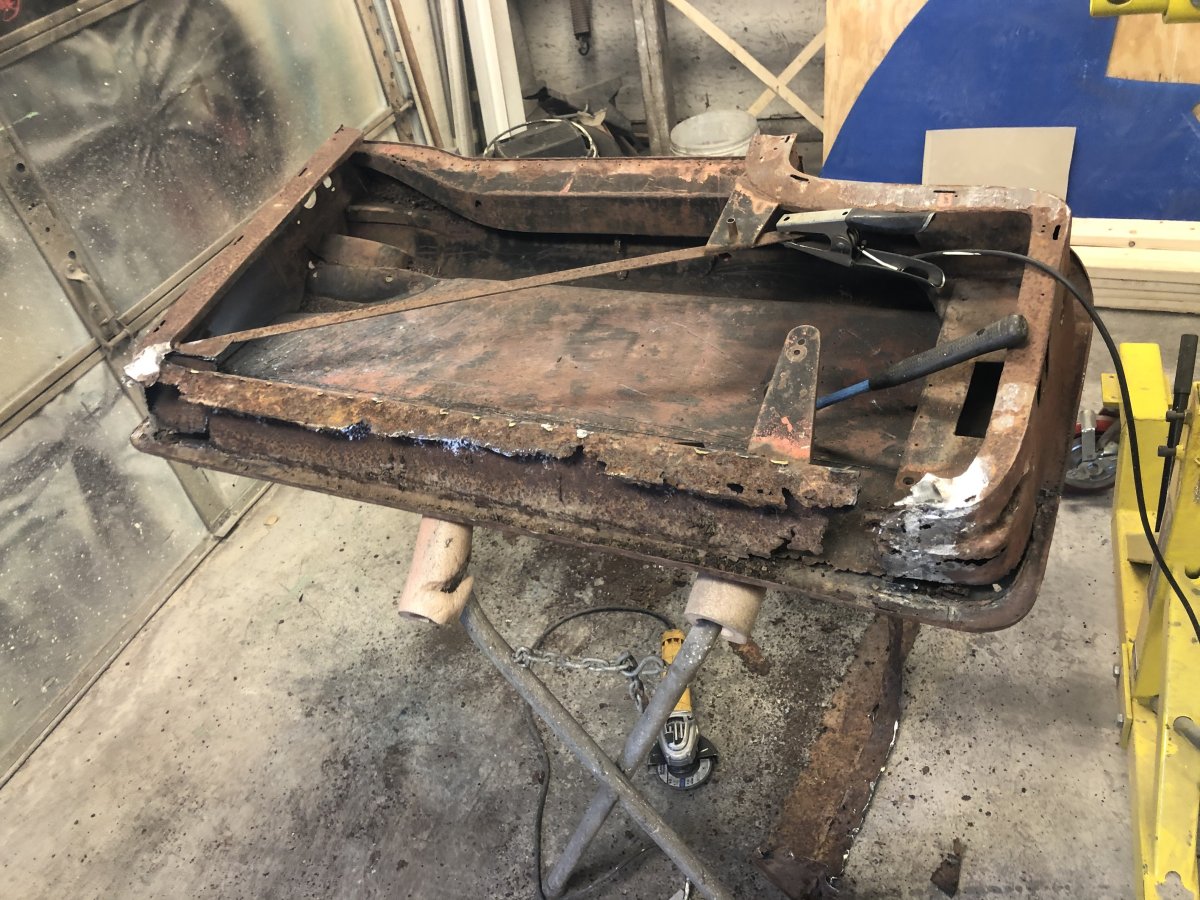
I removed the original rusted cowl from the body
and damn near dropped it on my feet.
I couldn't believe how heavy it was
as I had just fabricated the replacement piece and it was comparatively light.
I weighed the two pieces and the new one was just under 8 pounds.
The rusty piece weighed in at 24.4 pounds!!
There was 16 pounds of lead on it for shaping the top.
I built the replacement piece to the elevation of the lead on the old piece.
This is the original piece in place yet.
There is also a video on my website which shows the extent of the rust
in this area especially on the underside
This is the newly fabricated replacement rear cowl
with the trunk drain trough tacked on.
Here the new cowl is just set in place.
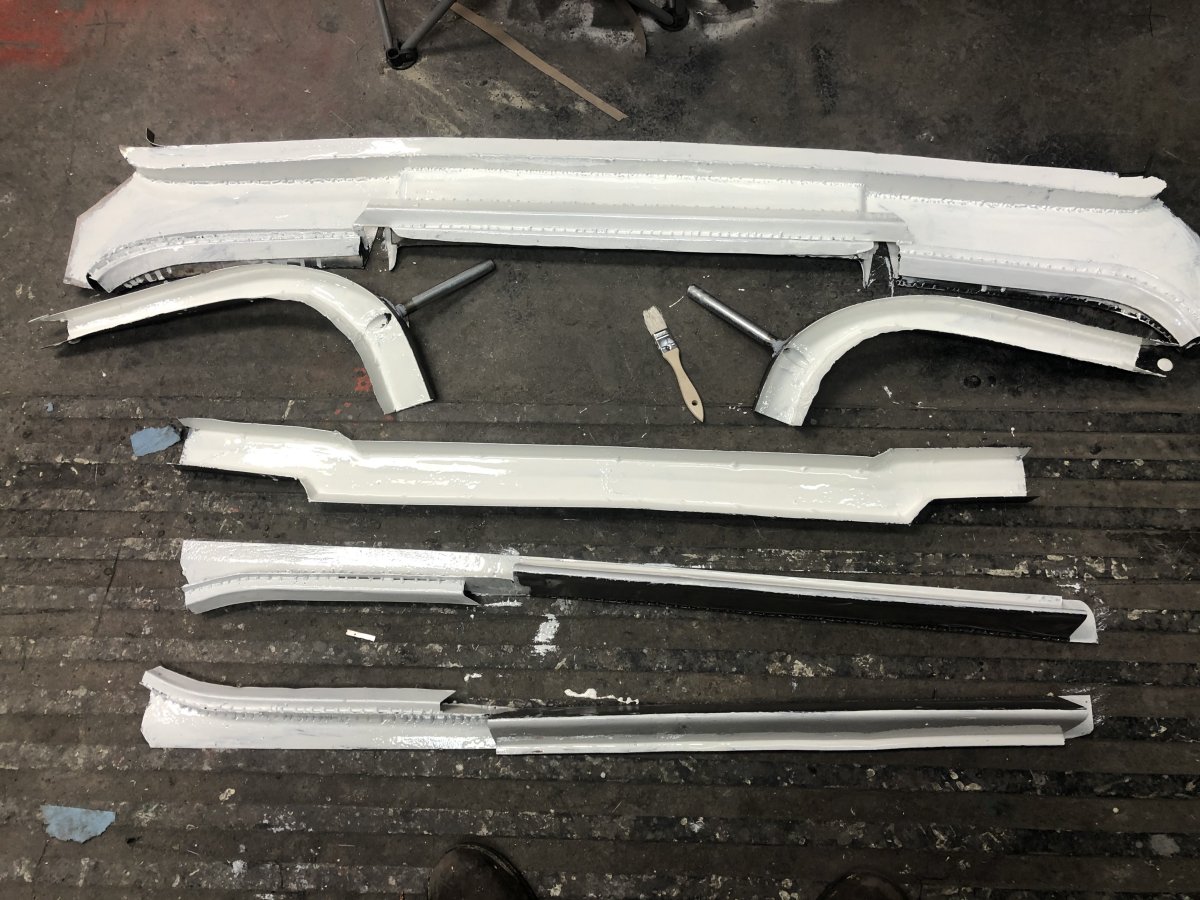
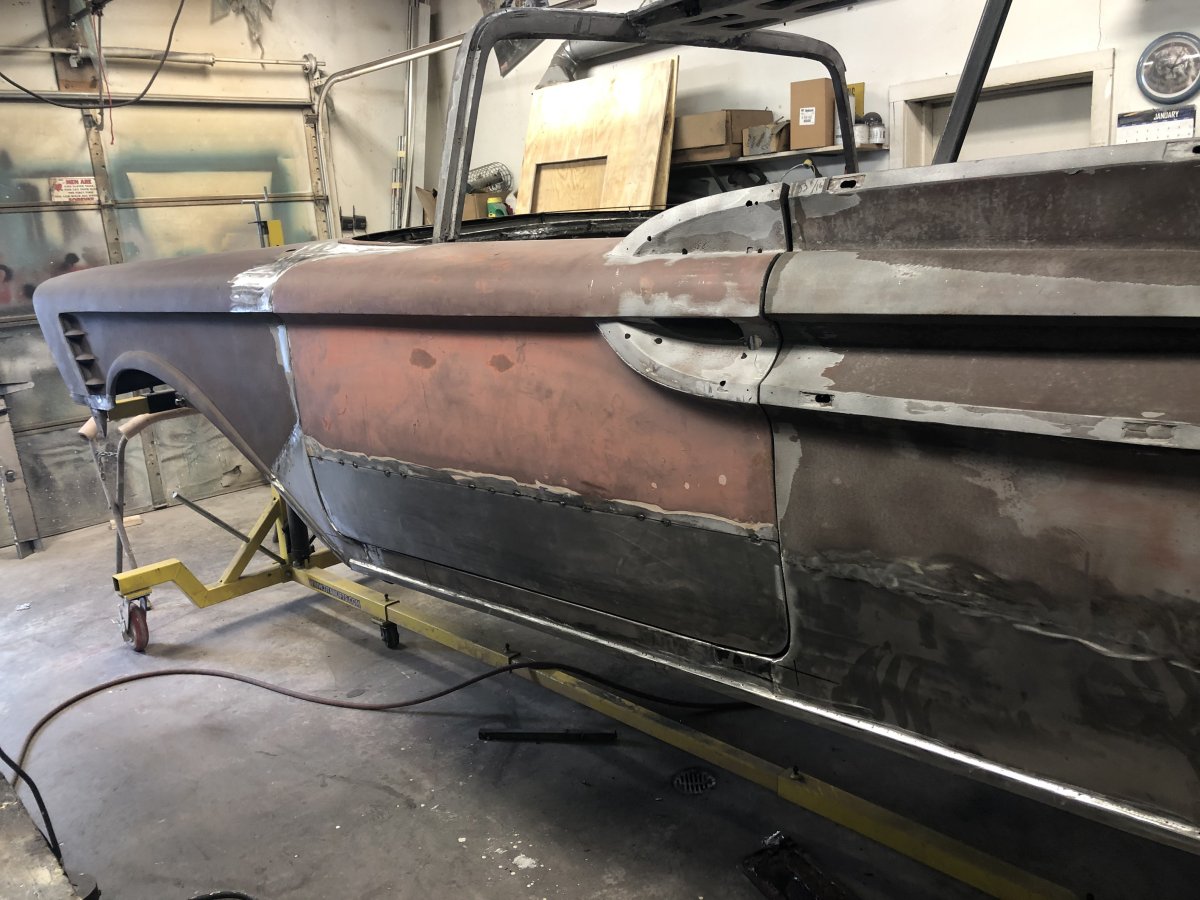
Now I had to do similar reconstruction
from this new cowl to the door posts on both sides.
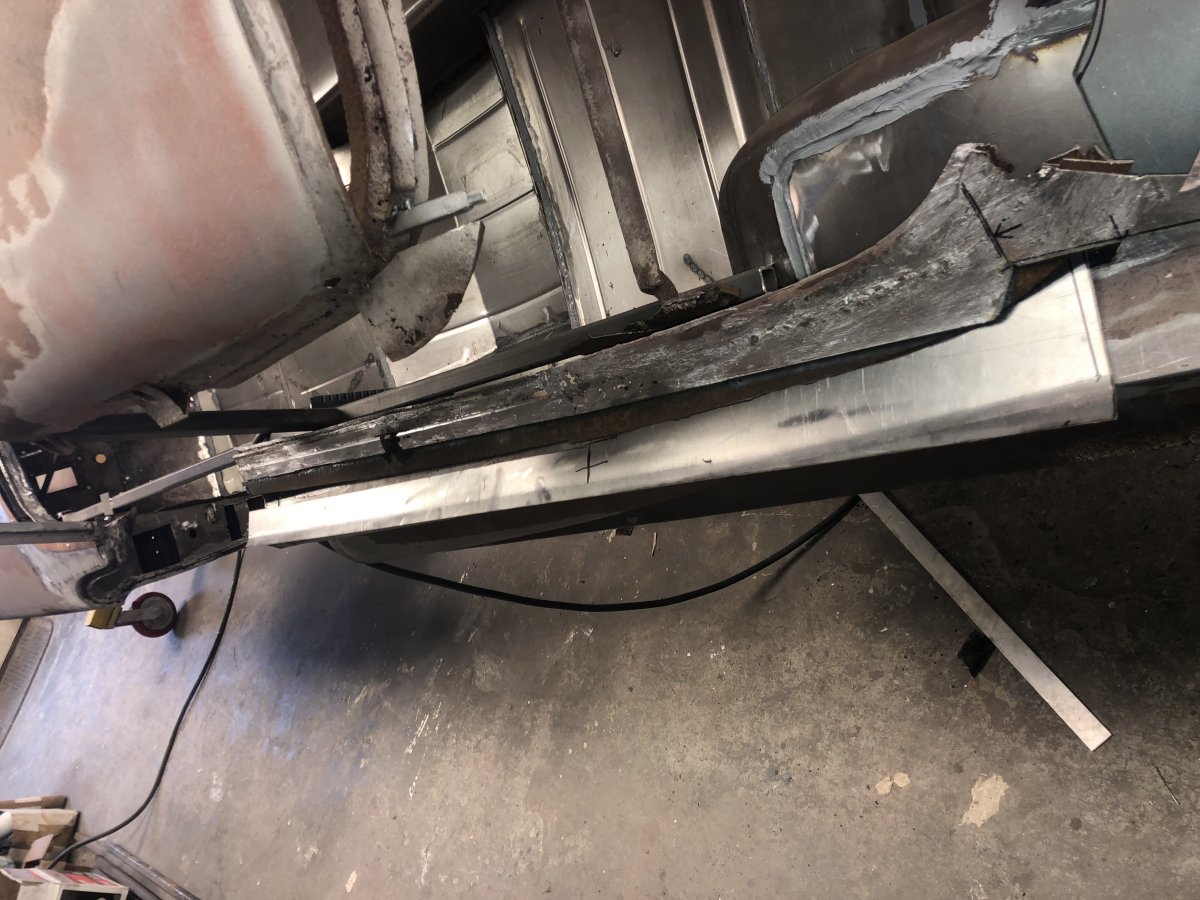
I built all the pieces Including drain trough pieces
for under the windows and then coated
all the hidden areas with KBS rustproofing
before welding them in place.
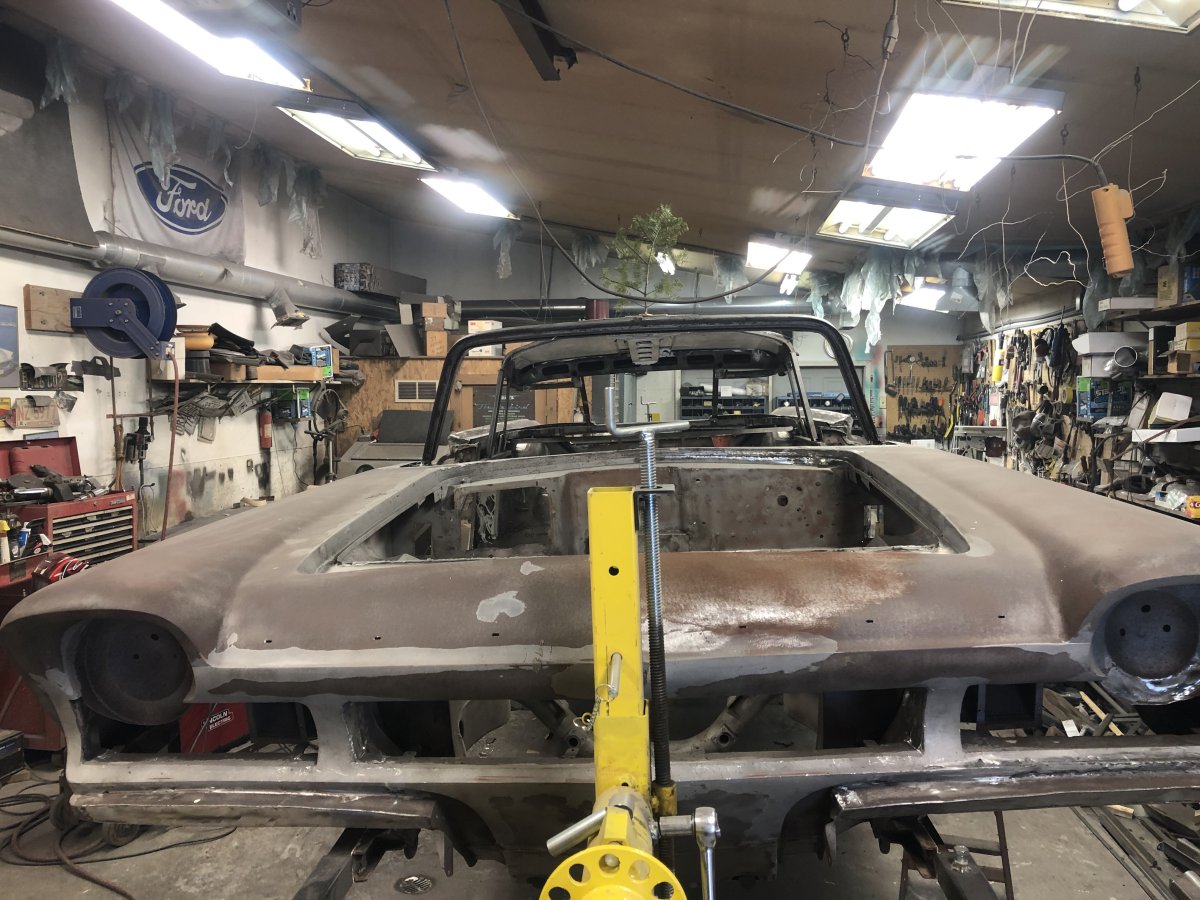
The rear turn signals are in the back corners of the roof.
Like everything else,
the housing areas were badly rusted so I rebuilt both of them
and with that the main body of the car
is rust free and ready for finishing.
When ironworkers complete a structure they build
they erect a Christmas tree on top of it
so in keeping with their tradition
I erected this small Christmas tree on top of the XMTC.
DOOR RECONSTRUCTION
I still needed to cut the bottom 8 inches
off each door and rebuild them
as well as completely construct a new hood and trunk lid
As you can see there's not much left of the door bottom.
This is the drivers door and the passenger door
will need the same reconstruction.
I had the door on and off the car numerous times
making sure the alignment was right before I welded everything solid.
LOOKING AHEAD
A few days ago I brought the engine to Midwest Engine Rebuilders
here in Duluth to get the engine a complete overhaul.
It didn't have many miles on it
but with it sitting so long I don't want to take anything for granted
so it's getting a complete overhaul.
Same goes for the transmission
but I'll be doing that myself
in the not too distant future.
I have the drivers door done at this point
so I'll sign off until the next update.
Thanks again for reading!
Be sure to watch for further updates at THE RESTORATION UPDATE PAGE
Click here to go back to the Restoration page Or
here to Go back to TOM MARUSKA CARS