<bgsound src="http://www.cpinternet.com/~tpls63/undersea.mid" loop=infinite>


May 20, 2004 update:
I decided not to put the front hood on quite yet too,
There is too much to do under there and it'll be easier
without the hood in the way.
I did get the doors on the car and the hood and deck lid sanded and buffed today.
I also just realized that I never put up the pictures of
the hood repair yet.
As are most of the amphi hoods are I guess, mine was rusty along
the front edge too, on the outside and the inside.
I sandblasted it to determine the extent of the rust,
as you know, sandblasting will find any rust weak metal and blow
holes in it. It will also warp the metal so never
sandblast any sheet metal you don't plan on
spending some time on to repair.
I cut off about 1" of the leading edge on top and about 1 1/2"
on the bottom. I was able to leave the "key" holes on top
but on the bottom had to cut them and the welded in nuts
for the hood locks away. New ones had to be welded into the
new piece I fabricated. I made the new section in 4 pieces
joined at the point of the bow. I used a acetylene torch to heat
the sections, before I welded them together, to form them for the
compound bends required. After I got the curves right (I checked each
piece fitting it to the car)I welded the two top pieces
together and then welded the bottom pieces to the top and then
tack welded a couple points to the hood. I then placed the
hood onto the car to check the fit. (I had the car on the
rotisserie at the time so I had to prop the front up and remove
the rotis bracket so I could get the hood in place.)
After a few adjustments I got my perfect fit and completed the welds
and ground them smooth in preparation for filler.
As you can see, it turned out beautiful and the repair is completely
completely invisible on top and underneath.
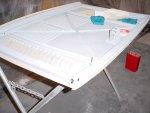
Fortunately the deck lid was completely solid.
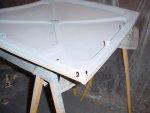
I drilled holes in the corners of the webbing of the deck lid
and hood and treated inside with a rust neutralizer
followed by rust proofing several days later allowing plenty
of dry time for the neutralizer. (This is also on Page 9)
They should give many years of trouble free service now.
I also had to make similar repairs to the bottom 4" of both
"top arm cavities", and even though they aren't seen,
I made the repairs as if they were, grinding and filling both sides
to make them imperceptible.
The complete exterior is sanded and buffed now and going back
together. Note on the picture of the hood wet sanded
the masking tape on the edges. It's VERY easy to catch an edge
when you're machine buffing with rubbing compound and take all
the paint off!!! Be very careful and use masking tape on all
edges and body ridges. I'll have a picture of the body with the tape
all over it on the next update. I hand wet sand first with 1500 grit
(using a sanding block of course) and then go over the whole thing again
with 2000 grit. Use a small squeegee to dry a section after
you wet sand it. If there are any areas you missed you'll find them
this way. Small recesses in an "orange peel" finish will show
up like a field of diamonds after sanding and drying.
Don't put the tape on before you wet sand because
you can control what you're doing by hand, but then after the 2000
mask off the edges and proceed to machine buff with rubbing compound
designed for that operation. I use a wood pad for this part.
After that, it's pretty safe to remove the tape and
proceed with the machine glaze, again using the proper compound,
and a clean pad. I use a very soft foam finishing pad.
this is relatively safe on the edges, but if you're not sure of yourself,
leave the tape on and do the edges by hand after you finish the
flats. It actually is quite easy to hand finish the edges, and a
lot safer. Come back soon.
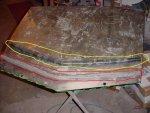
Broken Nose
| 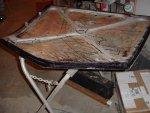
Underside
| 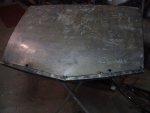
Nose Job
| 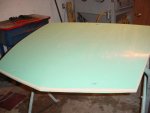
Wet sanded
|
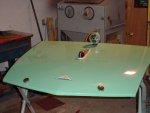
Nice nose!
| 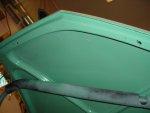
Bottom side
| 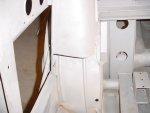
Top Arm Boot Cut Off
| 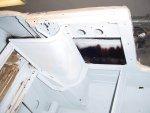
Top Arm Boot Repaired
|
Rust Proof Deck
| 
Rust Proof Hood
|
Page 1
Page 2
Page 3
Page 4
Page 5
Page 6
Page 7
Page 8
Page 9
Page 10
Page 11
Page 12
Page 13
Page 14
Page 15
Page 16
Click here to go back to

If you want to contact me, click the mailbox 
Images and text Copyright © 2004 by Thomas Maruska